How to Cover Kitchen Wall Tiles Without Removing Them: 7 Options Compared

Pulling old tiles off a kitchen wall is a nightmare. Dust everywhere. Chunks of plaster coming away with them. A whole weekend gone, and a wrecked wall to patch up before you can even start the nice part.
Here’s the thing, though. You usually don’t have to go through this much trouble.
Tiles can be covered and left right where they are. Below are seven options for how to cover wall tiles without removing them.
First Things First, Are the Tiles Perfect?
Quick check before anything else. Whatever you stick on top is only as good as what’s under it.
- Tap along the tiles. Any that sound hollow are lifting.
- Push on the grout. Crumbly bits mean trouble.
- Scan for damp. Trapped moisture ruins everything later.
A couple of loose ones? Re-fix them. A solid tiled wall makes a brilliant base.
The 7 Ways to Cover Kitchen Tiles
1. Acrylic Splashback Panels
This should be the first pick for most kitchens.
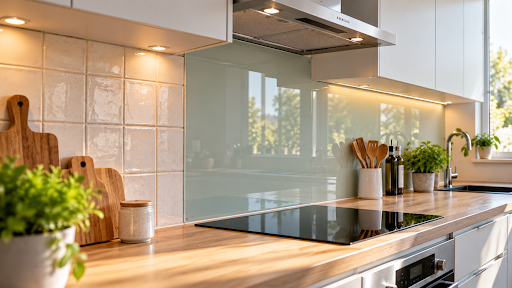
Apply adhesive and press a single panel straight over your old tiles. The tiles disappear underneath, with no grout lines or visible joins.
You get a smooth, glossy wall in whatever colour you fancy. A made-to-measure acrylic kitchen splashback transforms old tiles in a single afternoon.
2. Tile Paint
It is low-cost and easy to apply with a little effort.
Clean and prime the tiles, then paint straight over the surface, including the grout lines. A single tin is inexpensive and offers a dramatic visual update.
However, the paint wears quickly around sinks and hobs, requiring frequent touch-ups within a year or two.
3. Tile Stickers
| Cost | Low |
| Effort | Quite easy, no tools |
| Lifespan | 2-3 years |
| Best for | Renters, quick wins |
These peel-and-stick vinyl covers fit individual tiles and come in plain colours or patterned designs. They are ideal for rental homes because you can peel them off when moving out without damaging the underlying wall.
4. Wall Panels (PVC or Laminate)
Large wall panels to cover tiles let you update an entire surface in one quick installation. A single panel covers a wide section of wall with virtually no visible joints.
Where they’re great:
- Shower walls and long splashback runs
- Covering loads of wall, fast
- Grout-free and waterproof
Where they’re not:
- Doesn’t look as pricey as acrylic or glass
- Cheap ones feel slightly flimsy underhand
- Requires accurate measuring around tight corners
They are an ideal middle ground when you need to cover a large area quickly and cleanly.
5. Stainless Steel or Aluminium Sheet
Metal sheets fitted over tiles deliver a clean, commercial kitchen finish. They resist high heat, making them an ideal choice directly behind a cooker.
- Pros: Heatproof near hobs, easy to wipe down, and available in brushed or matte finishes.
- Cons: They show fingerprints easily and require precise fitting with heavy-duty adhesive or screws.
It is a durable, professional option that handles heavy use behind hot cooking areas.
6. New Tiles Over Old (Tile-on-Tile)
You can tile directly over old tiles if you prepare the surface correctly. The right primer and adhesive ensure the new layer lasts for years.
The basic process:
- Clean and sand the old tiles to create a rough grip.
- Apply a specialized tile-on-tile primer.
- Secure the new tiles using strong adhesive.
- Grout the joints as normal.
This method adds a few millimetres of thickness to your wall, but it gives you a fresh tiled look without the mess of stripping the old surface.
7. Microcement
Microcement is a thin layer troweled directly over tiles to create a seamless, polished-concrete finish. It offers a premium, modern look that completely eliminates grout lines.
- The Good: Highly durable, fully waterproof, and gives a luxury, custom finish.
- The Catch: It’s the most expensive option and can be difficult to apply yourself smoothly.
Unless you have specialist plastering skills, hiring a professional is the best way to get a flawless result.
Quick Comparison: Which Option Wins?
| Option | Cost | Effort | Durability | Best for |
| Acrylic panel | Mid | Easy | High | A fast, lasting finish |
| Tile paint | Very low | Medium | Low | Tight budgets |
| Tile stickers | Low | Easy | Low | Renters |
| Wall panels | Mid | Easy | Mid | Large areas |
| Metal sheet | Mid-high | Harder | High | Behind a hob |
| Tile-on-tile | Mid | Hard | High | Tile lovers |
| Microcement | High | Hard | High | A designer look |
Essential Rules Before You Start
Get these three basics right so your installation stays secure:
- Degrease thoroughly
Clean the surface completely and let it dry. Grease stops adhesive from bonding.
- Check your clearance
Extra thickness sticks out. Ensure new panels do not block sockets, worktops, or window frames.
- Use heat-safe materials
Never put an acrylic splashback near open flames. Use aluminium composite sheets behind hobs instead.
Finish Your Project This Weekend!
Covering old tiles is faster, cleaner, and cheaper than tearing them down. You can transform your space without hiring a skip or living through a week of mess.
Measuring your tiled wall takes just a few minutes. Picking the right cover-up method is the simplest road to a complete kitchen facelift.
FAQs
Can you put a splashback straight over tiles?
Yes, provided the existing tiles are flat, clean, and securely fixed. The new panel bonds directly to the surface, hiding them completely.
What is the cheapest way to cover kitchen tiles?
Tile paint and vinyl stickers are the most low-cost options. However, they wear out faster than solid panels and need replacing sooner.
Does covering tiles cause damp or mould?
No, provided the original wall is dry and structurally sound. Clear up any existing moisture issues before fitting your new surface.
Can you cover tiles directly behind a hob?
Yes, but you must use heat-safe materials. Metal or aluminium composite panels resist high heat that would otherwise damage paint, vinyl, or acrylic.